KMM Client
KMM Client is a KMM Extension App. KMM Client extends the standard capabilities of Android Management API by enabling additional device management features directly on managed Android devices.
The application runs in the background on enrolled devices and allows KMM to perform advanced management actions that are not available through standard Android Management API policies alone.
Some of the features require a separate Kuori Security Service application that is available in Managed Google Play. This service provides privileged access to specific Android system APIs that are not available to standard Android applications.
The following sections describe the available features and how to enable KMM Client on enrolled devices.
Features
-
Device online status
0.1.0-
Pings KMM to tell if Client is currently active
-
-
Background image change
0.1.0-
Change background image via managed configurations
-
-
Enabling gesture navigation
0.1.0Requires Security Service-
Gesture navigation set on/off via managed configurations
-
-
Custom application installation (APK)
0.2.0-
Get and install desired custom APKs from the server
-
-
Screen capture (screenshot)
0.2.0Requires Security Service-
Server requests a screenshot and client sends image to the server
-
-
Setting of landscape/portrait mode
0.2.0Requires Security Service-
Display Rotation set via managed configurations
-
-
File upload from the server
0.3.0-
Upload files to specific locations on the device
-
-
Automatically wake DSM client (if installed)
0.3.0-
KMM Client detects if DSM Client is installed and wakes it via broadcast
-
- Device location
0.6.0
-
KMM Client reports the device position; KMM shows it on the device map and on the device page's Location tab.
-
How to enable KMM Client
When creating a Device Group, the Use Client option is enabled by default. Enabling this option automatically adds the KMM Client and required Setup Action to the new device group. The Use Security Service option is disabled on default. Enabling this option automatically adds the Kuori Security Service to the new device group. These applications are added to the KMM enterprise by default.
A Managed Configuration for the Client must also be selected. Default managed configuration is selected automatically. Custom managed configurations can also be created to modify the behavior and settings of the Client. These configuration options are described in detail in the following Features section.
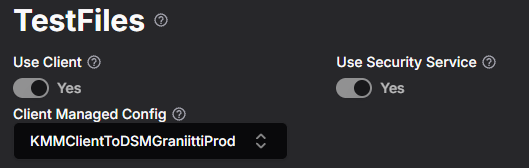
Note: You can also manually create Application Policies for KMM Client and Security Service and Interaction Policy for the Setup Action, but this is the preferred way.
Adding Custom Managed Configurations
To add custom Managed Configurations, you need API key for KMM Client. Navigate to API Keys from the side navigation and click Create new API key:

Enter display name for the API key (this can not be edited later). Also save the actual API key to somewhere secure, you won’t be able to see it again.

You can choose to edit existing one or create a new one. To Create new, click the Create button:
Choose KMM Client from the package name dropdown:

Enter description name for the configuration and select the settings you want to configure (API key is mandatory).
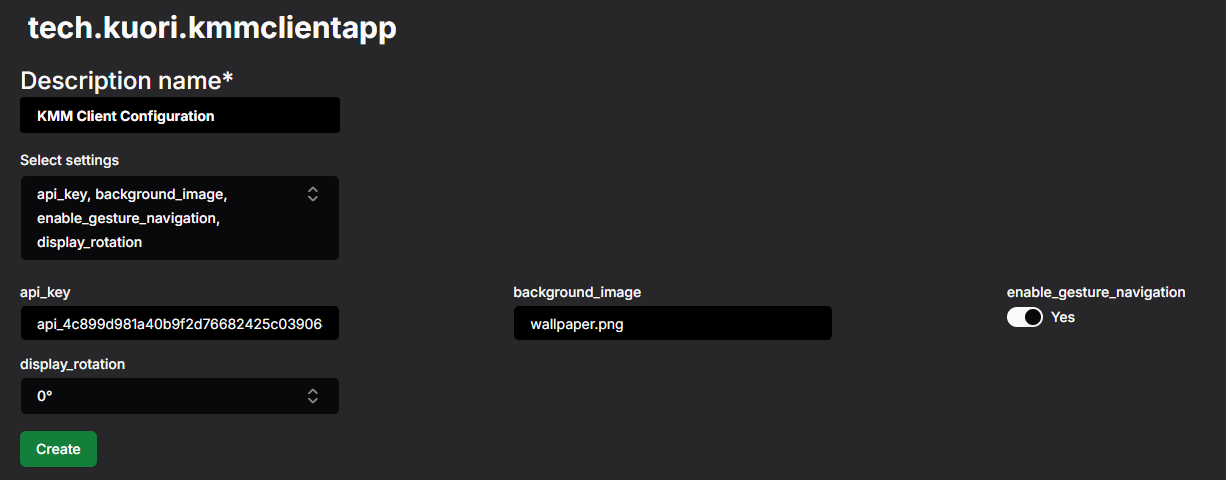
The Background Image needs a filename for the desired image. The image needs to be uploaded to the KMM first. To upload image, navigate to Files from the side navigation and click Upload File:

For background image the description is optional and destination folder is not needed. Destination folder is used for file upload to the device. More about file upload later in the Features Explained.

Features Explained
Server ping / Online status

Background image
Sets the background image shown on the device home screen. Choose an image that fits your device screens; the KMM Client applies it when the configuration is published to the device group. The image is set by the KMM Client together with its Security Service app, so both must be installed on the device.
Enable gesture navigation
Switches the device to gesture navigation instead of the three-button navigation bar. Its main purpose is to hide the taskbar when an application runs in kiosk mode, so the user sees only the kiosk app. Set it to **Yes** to hide the taskbar and **No** to keep the standard navigation bar. In the ready-made configuration this setting is **Yes**.
Display rotation
Fixes the orientation of the device screen. If the picture on the screen isn't oriented correctly from the start (for example, it's showing landscape content on a portrait-mounted totem, or it's simply upside down), you can fix this from the KMM client. The rotation setting only offers four fixed values — 0°, 90°, 180°, and 270° — so you just pick whichever of the four matches how the screen is physically mounted, and the display will reorient to match. It's not a fine-tune/free-angle adjustment, just one of those four positions.
Screen capture (screenshot)
Screenshot can be requested from Device page. Navigate to Devices from side navigation and open the desired device from the View button:

From the Commands tab you can find Request Screenshot button:

When requested, the button stays inactive until the screenshot is received from the Client:


Custom APK installation
KMM Client installs desired APKs from KMM. To add custom APK to device group, navigate to Applications → Application List from the side navigation and click upload APK:

Choose the APK file and click Upload.
Next you need to create Application Policy for the Custom APK. Navigate to Policies → Application from the side navigation and click create new:

Enter description name and choose the application from the dropdown:

When custom APK is chosen, the necessary settings are set by default. You can change the APK version code (if multiple versions of the same APK are uploaded to the KMM):

Now that Application Policy can be added to the Device Group. Navigate to Device Groups from the side navigation and click open the desired Device Group from the list:
Click Edit and choose the Application Policy from the Applications dropdown:
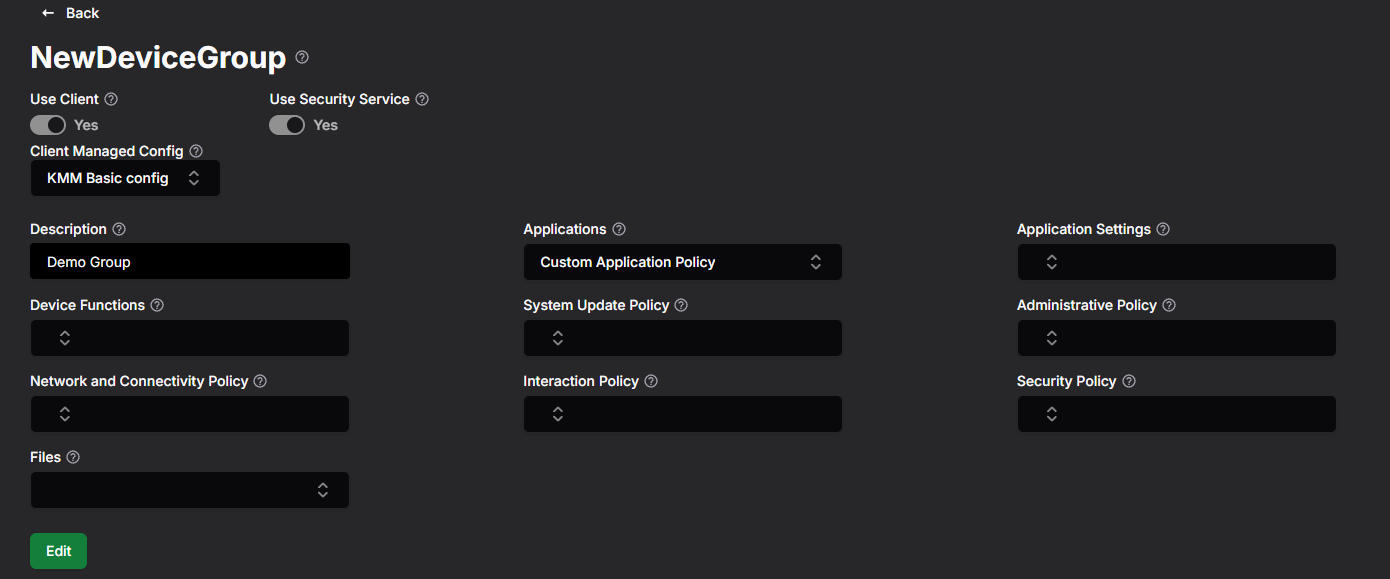
KMM Client installs the desired APKs assigned to its Device Group.
File upload
Upload files to specific locations on the device. First upload the desired files to KMM. Navigate to Files from the side navigation and click upload file:
Choose the file, and enter the description (optional). Destination folder offers Android’s default folders and also a Custom folder. If Destination Folder is not provided, the file will be downloaded to /Downloads:

Next add that file to the Device Group. Navigate to Device Groups from the side navigation, click open the desired Device Group from the list:
Click Edit and choose the file(s) from the Files dropdown:
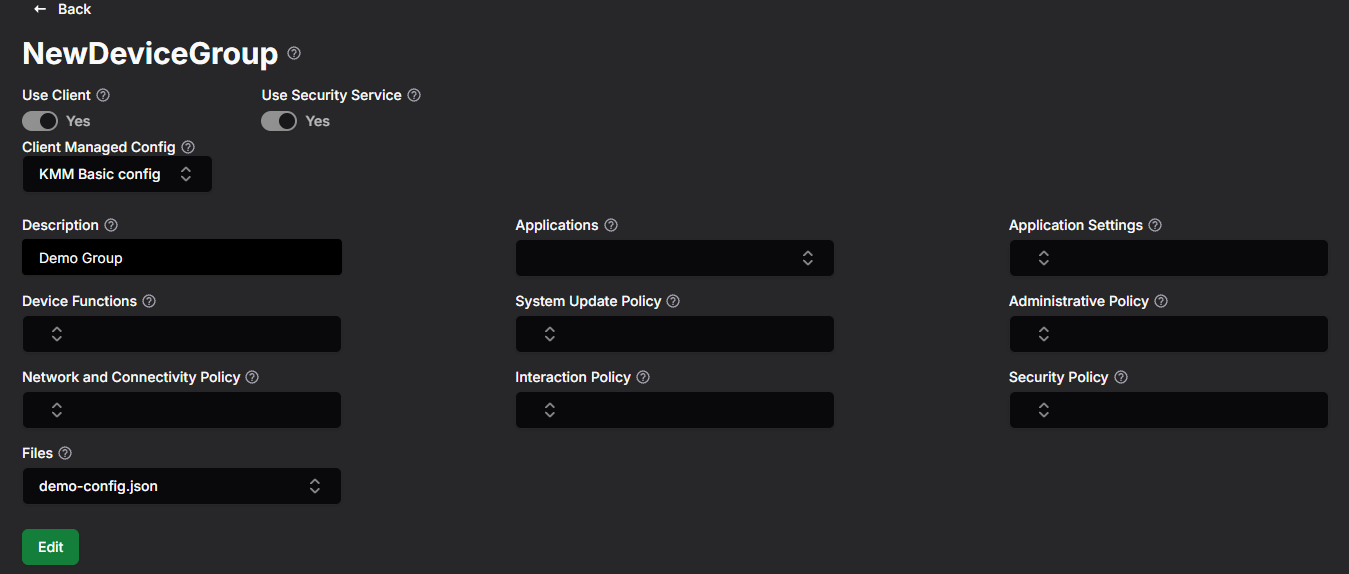
KMM Client downloads the desired files assigned to its Device Group.
Automatically wake DSM Client if installed on the device
KMM Client detects if DSM Client is installed and wakes it up via broadcast.