
System Update Policy
A System Update policy controls how the devices in a device group install Android system updates:
-
install updates automatically, only within a daily maintenance window, or postpone them
-
freeze periods — parts of the year during which no system updates are installed at all, for example during a busy season
You create the policy once and assign it to one or more device groups. Every device in those groups receives the same settings.
Before You Start
-
You need the Admin, Editor, Enterprise Admin or Enterprise Editor role to create, edit, copy or delete policies. Viewers can only open and read them. See User Roles in the manual index.
-
Freeze periods only take effect when Update Type is set — with Unspecified they do nothing.
-
A freeze period also blocks security patches. Keep freeze periods as short as the situation allows.
Where to Find It
Open Policies in the left-hand menu and select System Update.
The list shows every policy in the enterprise with its Display name, the Assigned Device Groups and the Min Android version it requires. Filter by Name or Update Type and select Search. Each row has view, copy and delete buttons.
How to Create a Policy
-
Open Policies → System Update.
-
Select Create, then Create new + (or Create from template + to start from a template — see the Policy Templates manual).
-
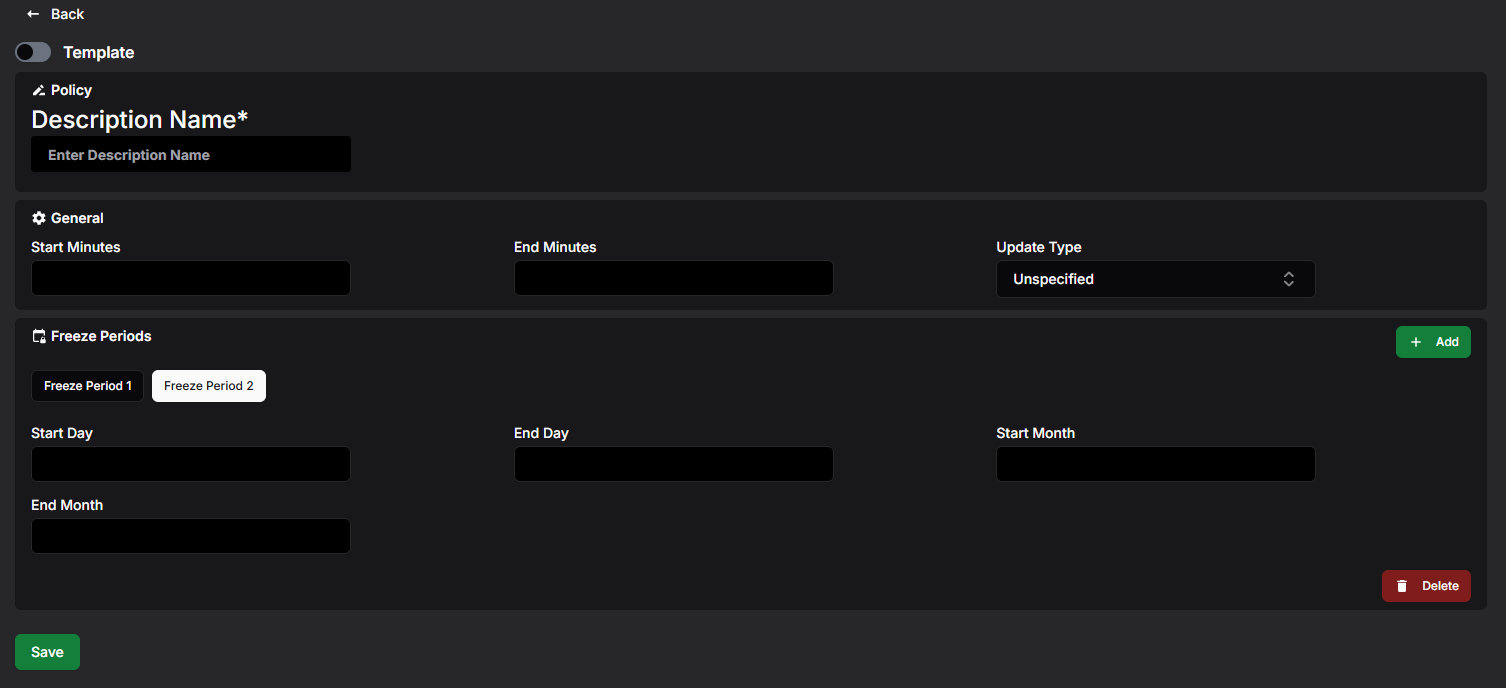
Enter a Description Name. This is required and must be unique within the enterprise.
-
Choose the Update Type, and for a windowed update the Start Minutes and End Minutes — see Settings Reference below.
-
Optionally add Freeze Periods — see below.
-
Select Save.
If something is wrong, an error message appears at the top of the page and the policy is not saved. See Troubleshooting at the end for the most common messages.
What Happens Next?
The new policy appears in the list. It does nothing until you assign it to a device group — see Assigning the Policy to a Device Group further down.
Settings Reference
General
Update Type
How system updates are installed:
-
Unspecified — the device's default behaviour, which typically asks the user to accept updates.
-
Automatic — updates install automatically as soon as they are available.
-
Windowed — updates install automatically, but only inside the daily maintenance window given by Start Minutes and End Minutes. App updates from Google Play also happen in this window. Strongly recommended for kiosk devices — it is the only way an app that is pinned to the foreground can be updated. An app whose Application policy sets AutoUpdateHighPriority ignores the window.
-
Postpone — automatic installation is postponed by up to 30 days. Security patches are not affected and still install.
Start Minutes and End Minutes
The daily maintenance window for the Windowed type, given as minutes after midnight in the device's local time (0–1439; for example 120 = 02:00 and 300 = 05:00). If the end is smaller than the start, the window runs over midnight. A window shorter than 30 minutes is extended to 30 minutes. Both fields are required for Windowed and must be left empty for every other type.
Freeze Periods
A freeze period is a yearly repeating date range during which the device installs no system updates at all — including security patches. Outside the freeze periods the chosen update type applies as normal.
-
Select Add in the Freeze Periods section. A new tab (Freeze Period 1, Freeze Period 2, …) appears.
-
Enter the start and end dates as numbers: Start Day (1–31), Start Month (1–12), End Day, End Month. The dates repeat every year — for example start 1.12. and end 15.1. freezes updates from December 1st to January 15th, over the year end.
-
To remove the period shown, select Delete at the bottom right of the section.
Rules for freeze periods:
-
a period may be at most 90 days long
-
periods must not overlap, and there must be at least 60 days between them, so a device is never frozen indefinitely
-
February 29th is ignored in the calculations; a period starting or ending on it behaves as February 28th
Viewing and Editing a Policy
-
In the policy list, select the eye button on the row you want to open.
-
If the policy is in use, Assigned to: at the top lists the device groups; each name is a link to that group.
-
Select Edit.
-
Change the settings — freeze periods can be added, changed and deleted here too. Select Save to keep the changes or Cancel to discard them.
Devices receive the updated settings through the device groups the policy is assigned to.
Copying a Policy
-
Select the copy button — either on the row in the list or at the bottom of an open policy.
-
In Enter display name for new copy, type a name of at least 3 characters.
-
Select Copy.
The copy contains the update type, window and freeze periods of the original. When you copy from an open policy, the copy is opened for you.
Templates
Administrators can save a policy as a global template with your organisation's preferred settings, and anyone can start a new policy from one with Create → Create from template +. See the Policy Templates manual.
Deleting a Policy
-
In the policy list, select the trash button on the row.
-
Confirm with Delete in the Confirm deletion dialog.
A policy that is still assigned to a device group cannot be deleted. Remove it from the group first.
Assigning the Policy to a Device Group
-
Open Device Groups and create a group or open an existing one.
-
In System Update Policy, select the policy.
-
Save the group.
A device group can have one System Update policy; a policy can be used by any number of groups. The System Update column in the device group list shows which policy each group uses.